I visited the WB Studio Tour recently and was inspired to have a go at recreating some Harry Potter props. The graphic designers who worked on the movie did a fantastic job populating the world with beautiful, believable designs. Working in print myself I was immediately drawn to these items. For my first project I thought I would look at the flying memos from the Ministry of Magic.
I was rather surprised given the general enthusiasm of the fan base that the resources to recreate one were not already available, but not to worry, I picked up some excellent reference on my visit to the Studios.
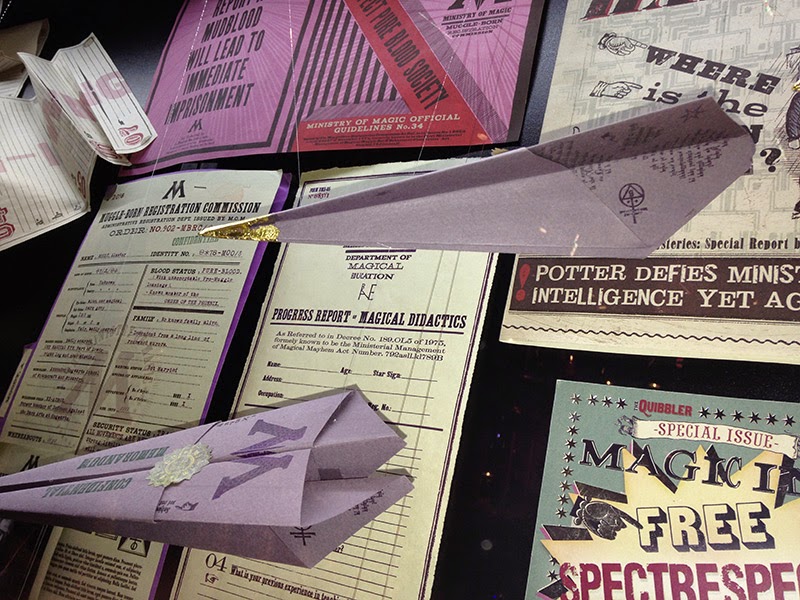 |
| The Interdepartmental Memos on display at the Warner Bros Studio Tour |
On examining my photos the first thing I noticed is that the majority of people who attempt to recreate these are making the wrong design of plane. Took me a few attempts but I discovered that to match the appearance of the ones in the movie you need an A4/A3 sheet of paper, and you need to start with the paper landscape...
Don't forget to visit my gallery for more of my Harry Potter items!
Materials needed:
1 sheet A4 lilac pastel paper.
1 sheet white sticky back paper
Ink jet printer
Red acrylic paint
Gold Leaf
Size (gold leaf glue)
(The last three items can be substituted for gold paint or even a gold gel pen if you’re after a quick finish)
I suggest you practice on a plain piece of paper until you’ve got the hang of folding the basic design.
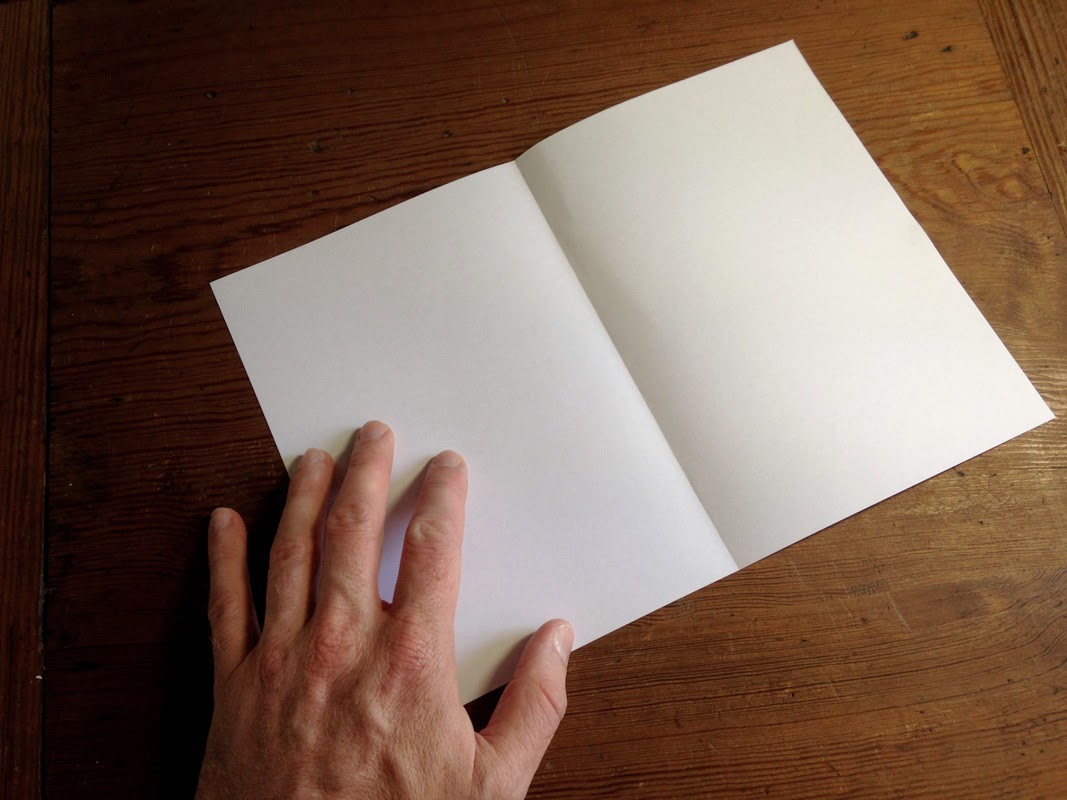
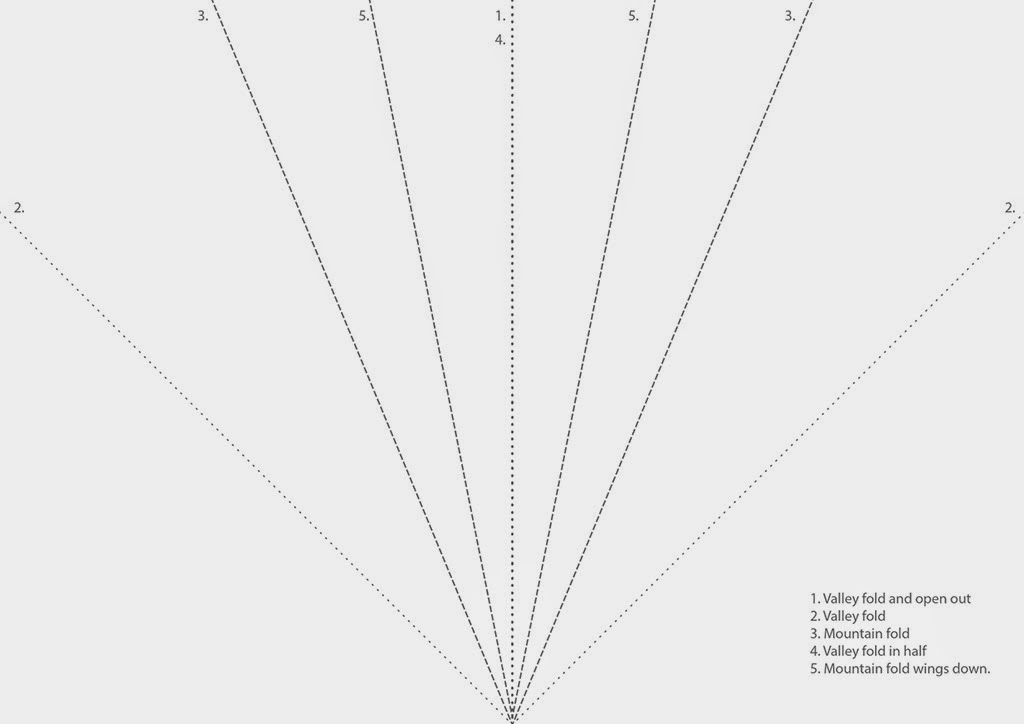
1. With your sheet landscape in front of you, fold it in half, then open it back out again
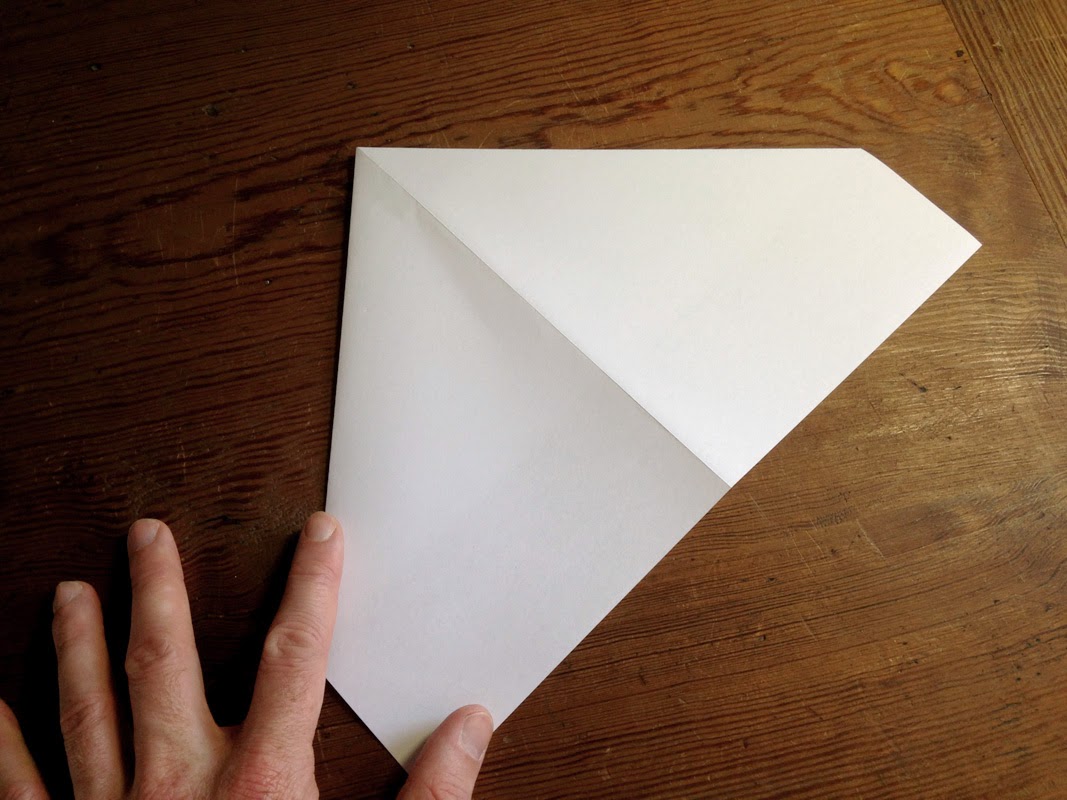
2. Now fold the top corners in to the centre
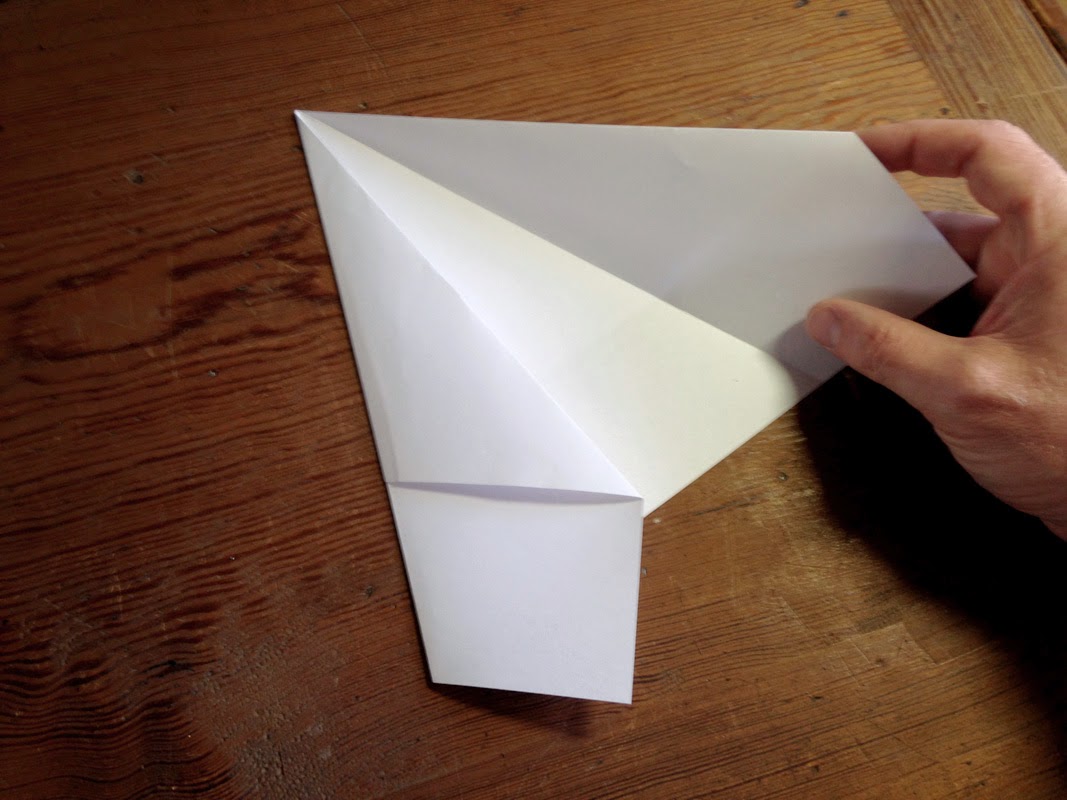
3. Turn the paper over and fold the top edges into the centre
4. Turn the paper over again and fold the plane in half
5. Now we need to fold the wings down on both sides… and there you have it. I’ve included the instructions as a screenshot in case you need a template to work to.
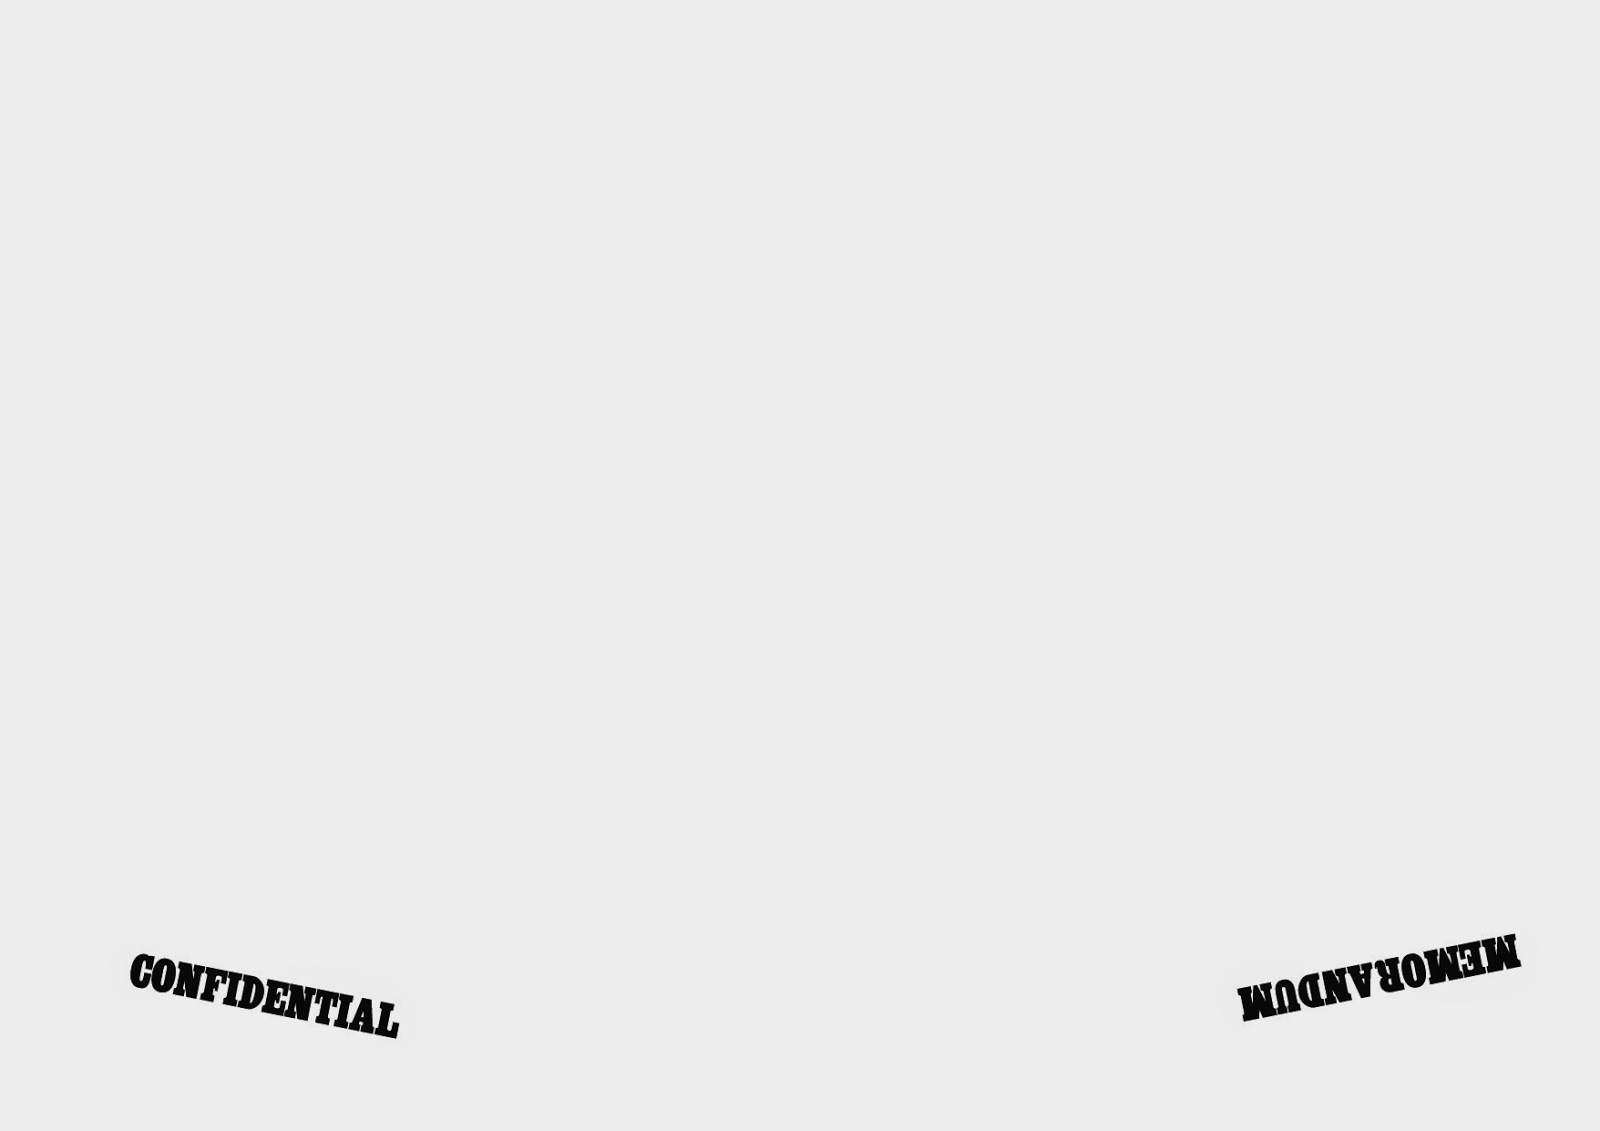
6. So now you know how to make a MoM aeroplane folded to the correct pattern but it really needs some decoration. Now you could take your lilac sheet and a black felt tip pen, copy out the designs from the reference photos and start from there… or you could run a print out of this design which should fit perfectly :)
NOTE: It turns out the Blogger site tints white images a subtle shade of grey. For a clean image you can download the vector PDF >>here<<.
Front:
NOTE: It turns out the Blogger site tints white images a subtle shade of grey. For a clean image you can download the vector PDF >>here<<.
Front:
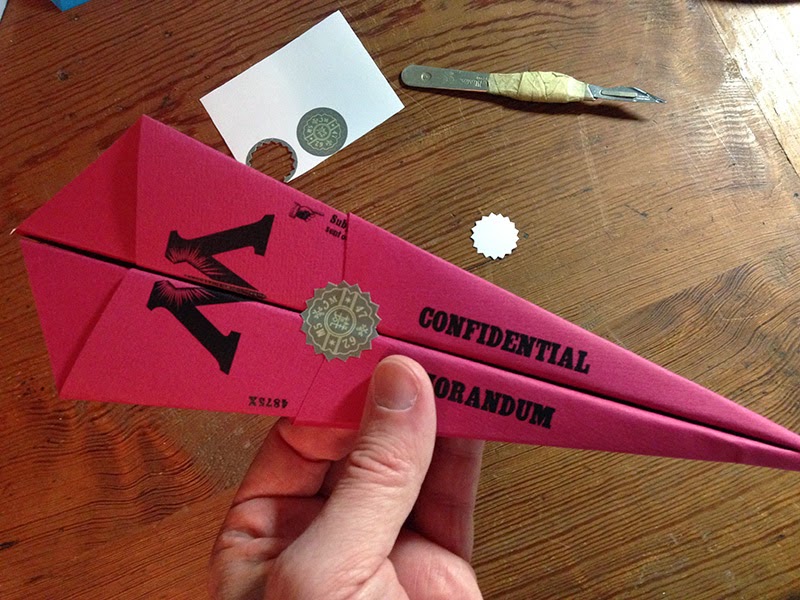
7. If you look closely you'll see there is a sticker on the plane that seals the memo. The design for this is in the image below. All you need to do is print some on plain white sticky backed sheets, cut them out with a sharp knife and apply them carefully to the centre of the plane.
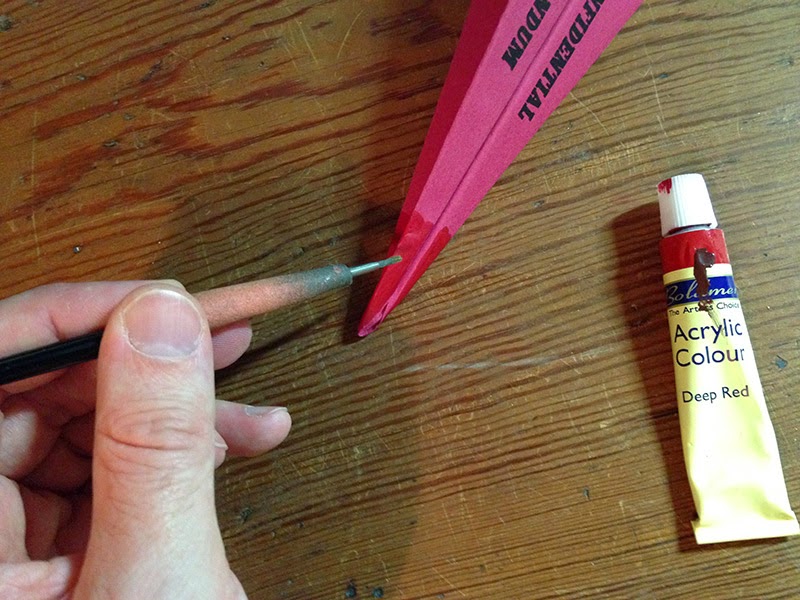
8. The finishing touch is to add the gold tip to the nose. You could use paint, or a gel pen, or even glue some foil on but the prop I saw used a gold leaf to achieve that rich, shiny finish. Gold leafing is far easier than you think so don’t be daunted. First we’re going to need to seal the surface where the leaf will be applied. We do this with a red acrylic which will provide a nice, plasticy, non absorbent surface. A red base also helps make the gold look richer. Paint the red acrylic in a scalloped pattern on the nose of the plane.
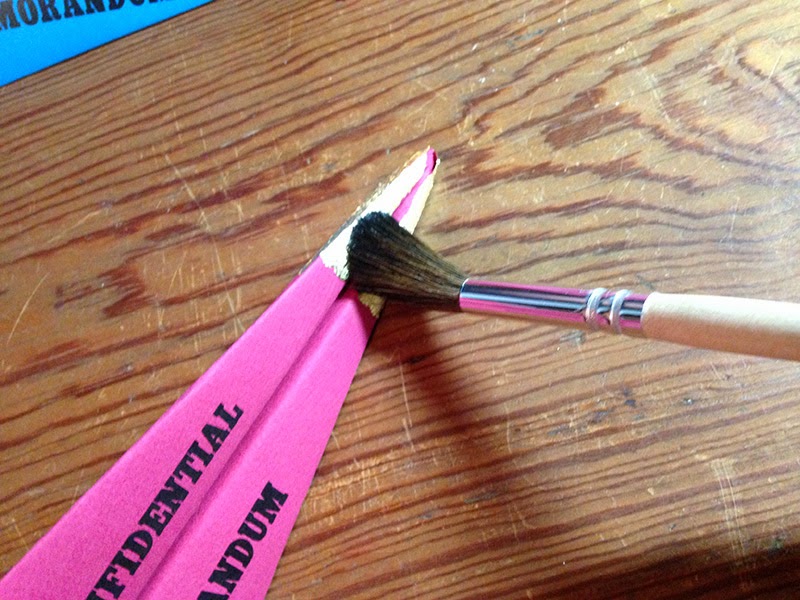
9. Once this is dry it’s time to apply the Size. This is a type of glue that remains tacky when it sets and will hold the leaf in place. Using an old/cheap brush, paint it on to the areas where you’ve applied the red paint then leave it for a few minutes to dry. Try not to do this in a dusty environment or the size will end up coated in particles and not be sticky enough to hold the gold.
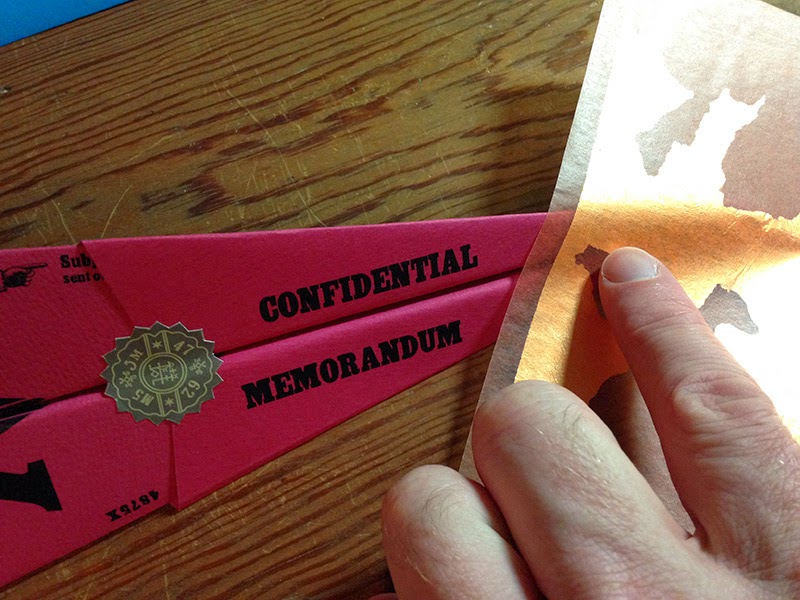
10. Finally take a sheet of gold leaf (I would recommend the transfer type that comes on a backing sheet) and lay it over the areas where you applied the size. Rub the back of the transfer sheet then gently lift it away. Take a soft brush and rub it over the surface to help make sure the gold sticks and any lose leaf is brushed away.
or does it? Look a little closer and you might notice the memos in the movie are actually subtly different from the display props. I’ll let you see if you can spot what that difference is…
If you have a go at making these then feel free to send me pictures, I’d love to see your efforts.










This comment has been removed by the author.
ReplyDeleteThese are excellent! Thank you.
ReplyDeleteDo you have the print front and back in a vector format so I can print it onto colored paper?
ReplyDeleteAwesome work mate!
Hi Cpt., glad you like the memo. I'm afraid I don't really understand, the black and white JPGS print on coloured paper just fine.
DeleteThanks for the reply. I got it to work. My son and I had fun folding these. He loves Origami.
DeleteLove it!!! I tweaked it a bit by playing with the color adjuster and made it purple.
ReplyDeleteThank you
The images are gray, so I'm not sure how the project will work without some adjustment. I'm going to see if I can do what Dawn did and make it transparent or purple.
ReplyDeleteApologies for the delayed response, despite my best efforts it is not possible to upload a perfect JPEG to this site. I now include a link to download a clean PDF of the design in the above text.
DeleteIt certainly is excellent which you have released so absorbing post.I am simply glad which we discovered ones webpage. I am just anticipating browse another, intriguing article.
ReplyDeletethanks for uploading this im in the process of making several for a harry potter book night, one problem i do have is when trying to print the sticker for the memo it comes out almost blue. have you got a png file for this i can use.
ReplyDeletePlease do more DIY Harry Potter Prop. you are very good
ReplyDeleteI agree. I love props you make and movies you like. I hope you will publish more props. Thanks.
ReplyDeleteTruly the best instructions of this I have seen anywhere. And you provided everything we need to recreate--thank you SOOO much! Such a help!
ReplyDeletethanks for the clean pdf!! it helped a lot!!
ReplyDeleteI made it and it turned out excellent, thank you very much for the exact instructions.
ReplyDeleteAccording to a photo at Fandom, however, a small error has crept into the seal. The number and letter combination is the following: M5, 3M, 47, 62, or are there different ones?