“Now for our next item. The Royal Crown of Bethmoora... A piece from a long lost culture.”
I recently acquired a 3D printer (a Flashforge Creator Pro to be exact) and since it arrived it’s been running pretty much constantly, providing a steady stream of objects downloaded from
Thingiverse.
 |
| My shiny new printer and a few of the items I've printed |
With the bank holiday weekend approaching I thought it was time to see if I could produce an item from scratch. I wanted to start with something reasonably simple that would lend itself to the 3D printing process. With its flat repeating sections the
Crown of Bethmoora seemed like an excellent choice.
 |
| Prince Nuada wearing the complete Crown |
1. Research
As it turns out there is very little reference available for this item and I ended up scrubbing through the DVD, finger poised over the pause key (like I need an excuse to watch a Hellboy movie again). There do appear to be two versions of the crown: a CG version that you see in animated close ups and the costume version you see Prince Nuada jumping about in. The main difference I could see was that the patterns on the costume version were not symmetrical. In the end I took some elements from each. I made the crown symmetrical for simplicity's sake but added depth to the pattern to make it look more interesting.
 |
| A small selection of reference images |
2. Planning
Once I’d assembled all the reference I could find I drew up a plan in Illustrator...
 |
| This is a combination of trace over and constructing from geometric shapes |
3. Modelling
...and used this to create the models in SketchUp. I’d not really used SketchUp before and have to confess to having mixed feelings about it. It’s a strange combination of beautifully simple and frustratingly obscure. Still, it seems that often success is less about what software you use and more about how determined you are to make the software you’ve got do the job.
 |
| It's blue because I accidentally made all the pieces inside out... |
4. Printing
Next I took the models into RepG and printed them out. All went well apart from the front of the front piece which I had to slice using Simplify3D.
 |
| Mmmmm, honeycomb centre. |
 |
| First section complete! |
5. Clean up
The ease of fabrication now possible with 3D printing is unfortunately balanced by the amount of finishing printed objects require. In order to obliterate the print lines everything needs a thorough sanding. As a bit of a cheat, after I’d sanded the raised areas and filled any obvious holes I ran some dilute PVA glue over the pieces to help hide the layer lines in the recessed areas. This didn't work as well as I'd hoped, really I should have used some acetone to smooth it out.
 |
| So much plastic dust... |
6. Detail
I knew the texture on the front of the crown would be too fine to print effectively so I recreated this with the help of a dremel.
 |
| Yeah, the drill's not running, but then I was holding a camera in the other hand |
7. Assembly
With the pieces prepared I now had to assemble them.
If this was for a costume then the back would be hidden and I would have probably glued the segments onto paper or card, allowing everything to hinge. As this was for display however I needed to keep the back of the pieces reasonably pristine.
I decided the best course of action was to pin the parts together. Since this would result in the crown having no flexibility I needed to plan the angles fairly carefully. I printed out a circular grid to help me space the parts evenly and roughly blue tacked it all together. Once I was happy with the spacing I drew around the parts with a marker pen to give me a working plan. I drilled holes in each piece where they were to join, inserted a short length of ABS plastic rod and used acetone to fuse the joint.
 |
| What would I do without blue tack? |
 |
| Ready for gluing |
 |
| Nearly done... |
8. Painting
The surface was prepped with a couple of coats of filler primer, then a coat of red to give the gold a good base. A layer of Plasticoat gold gives a brilliant shine to the piece.
 |
| A couple of coats of filler primer help smooth the finish a bit |
 |
| That Plasticoat stuff is magic! |
9. Weathering
Once the gold paint had fully cured I rubbed some black/brown acrylic paint into the recesses to bring out the detail. This also dulled down the gold a bit.
 |
| This shows the difference, an unweathered link on the left, a weathered link on the right. |
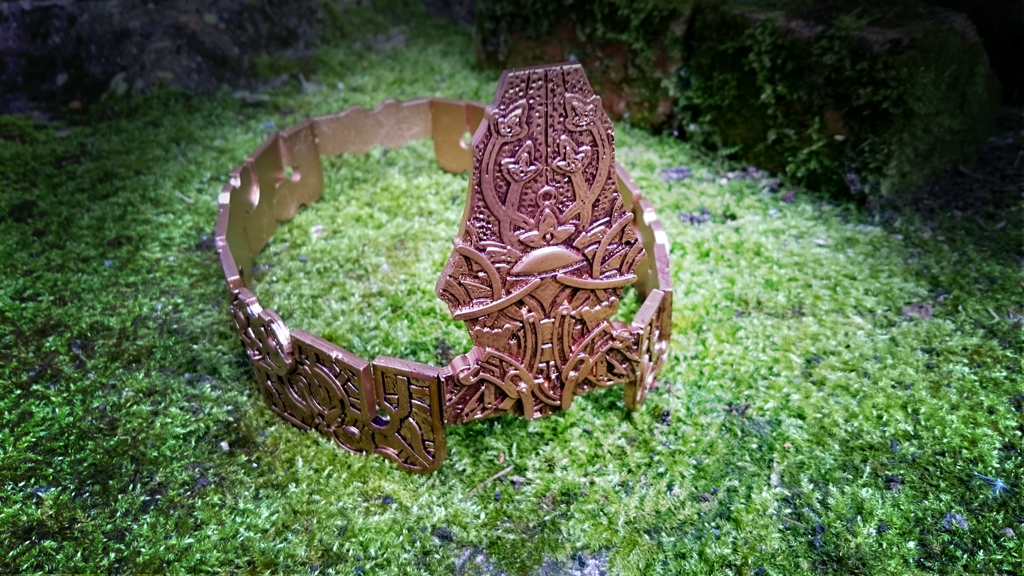
 |
| And here's the full crown starting to come together |
10. Finishing
I would have liked to use some gold leaf to pick out some highlights but the model was a bit too fiddly. In the end I decided to seal the surface and leave it as is.
So there you go. If you fancy having a go at making one of these yourself I’ve provided the model files for all of the parts
>>HERE<< (you may have to adjust the size if you're planning to wear it). If you do make one: send me a note, I'd be very interested to see what you've done.


Is it possible to buy it?
ReplyDeleteHi Gianfranco, it is indeed possible. I have them available on my website here: https://www.cantstoppainting.co.uk/product-page/crown-of-bethmoraa
Delete