Although I really enjoy making things and the processes involved I’m not much of a collector and there aren’t many props I actually desire to own. One fairly major exception to this is the Golden Idol from Raiders of the Lost Ark. I’m still kicking myself for not buying the Idol money-box I saw in my local comic shop fifteen odd years ago.
Given that I had some spare time at work recently I thought I’d model up an idol I could run out on my 3D printer. There are a few models already kicking around on the internet however I felt a better level of accuracy could be achieved.
I don't know how many of you are aware of the history of this prop already but when I started doing my research I learned that it has been the subject of much controversy over the years. Did the model have glass eyes or were they gold? Was there a delineating line between hair and forehead? It is only relatively recently that an original was sold at auction, thereby answering some of the long standing questions.
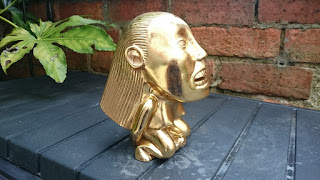
For most of my reference I used pictures of this particular prop, hereby known as the "Propstore Idol". It is widely accepted to be the hero idol used in the movie, with variations most often being attributed to either a stunt idol or the "Hatha Idol", a version that was inaccurately restored before being exhibited. Any blanks in my reference I filled in by referring to the Gobler Idol which I'm lead to believe was cast off an original prop.
For most of my reference I used pictures of this particular prop, hereby known as the "Propstore Idol". It is widely accepted to be the hero idol used in the movie, with variations most often being attributed to either a stunt idol or the "Hatha Idol", a version that was inaccurately restored before being exhibited. Any blanks in my reference I filled in by referring to the Gobler Idol which I'm lead to believe was cast off an original prop.
 |
| The Propstore Idol, somewhat less shiny that it once was. |
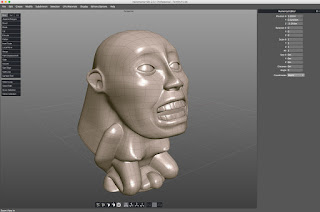
I started by drawing front and side profile views then loaded these into Silo 2.0 and started building the mesh using a poly modelling process. The build was fairly smooth, only running into difficulty when it came to the hair.
 |
| I paid special attention to the poly lines so I could add teeth in the right place later. |
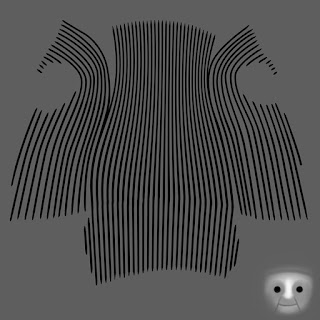
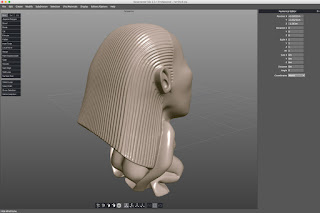
I tried a number of solutions to create the hair texture but eventually settled on displacement mapping which I applied using a trial version of 3DS Max. I also used this method to apply the face to the baby.
 |
| The finished idol model. |
In order to apply the displacement the mesh had to be very highly subdivided so I optimised it before print.
I printed the model in quarters. This allowed each piece to be run without supports and none of the sections was so large it needed to be run over night (not everyone in the household appreciates the chattering of a 3D printer). This also meant I had to go through the pain of attaching the pieces together and filling the gaps.
Once the pieces were glued together the sand/fill cycle began. Car body filler was liberally applied then ground away to get the model as smooth as possible before painting.
This took a few weeks of sanding on my lunch hours.
I know the original statue was vac-metalised however this process was a little outside of my budget. I ran a number of miniature tests to determine the best gold finish I could achieve. I experimented with Plasticote gold spray paint, Rub n Buff antique gold, liquid leaf, Gedeo gold coloured mirror effect leaf.
The rub'n'buff was OK and the gold spray was pretty similar. The liquid leaf ate through the gloss black undercoat but eventually set. The effect was similar to the previous two but with a higher gloss finish. The mirror leaf looked great however I'd applied it over a red base-coat and any gaps in the finish were extremely obvious. I decided the best option was to apply this leaf over an undercoat of gold spray.
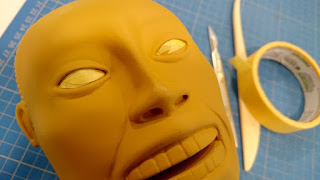 |
| Before I started the final paint work I masked the eyes as I intended to paint these in later. |
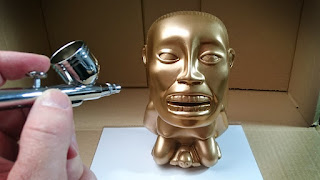
In my previous experiments with gold leaf I have always used a brush to apply the size. After testing this however I noticed that the texture of the brush marks was actually showing through the leaf. Fortuitously Volpin props had recently been working with gold leaf (on an amazing Elder Scroll you should totally check out) and through that I got the idea of applying the size with an airbrush. I'd been um-ing and ah-ing about acquiring one for a while and this seemed like the perfect excuse to finally give in to my tool buying urges.
I have a few different types of gold size. I'd been thinking that Japanese gold size might be good for this job as it is a bit thinner and might self level more easily however I discovered (on a test piece thankfully) that this stuff ate through the layer of gold spray paint I'd already applied. This being the case I went with a water based acrylic size.
I ran this through my newly acquired and exceptionally cheap airbrush. I kept a couple of scrap pieces of idol to hand so I could test drying times without touching the actual model.
After giving the model a liberal coating of size I waited for it to become tacky. When it was ready I applied the gold leaf as swiftly as possible, trying not to give dust any opportunity to settle on the tack. This went… OK. Bit patchy in places but I’m applying multiple coats. Eventually I got fed up of trying to airbrush the size on as it took ages and kept beading and running off the surface. I went back to using a brush.
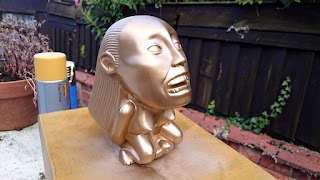
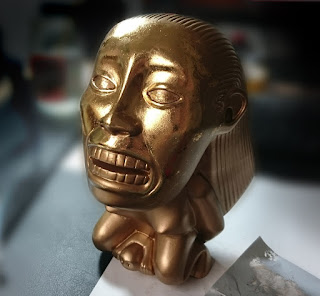
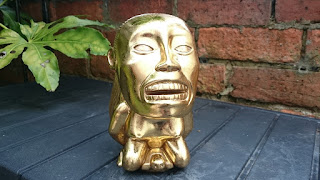
Despite layering up the leaf the finish so far is not quite as smooth as I might like but it has given the idol an interesting antique appearance, and boy is it shiny!
The next problem I discovered is that the size I had been using seems to remain tacky indefinitely. Even after a couple of weeks it was still sticky. In order to prevent the statue gathering a permanent layer of dust I realised I would need to seal it somehow.
My first attempt at applying varnish over gold leaf (thankfully on one of my test pieces) resulted in the gold crinkling up. Various tests with other varnishes resulted in similar results.
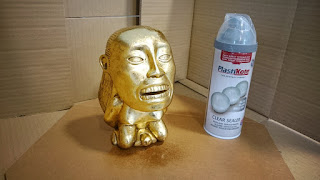
I was initially concerned this might be because the size was an unstable layer but as it turned out it was the gold spray paint reacting badly that caused the issue. It turns out that Plastikote produce a clear sealer that is safe to use with their gold paint so I applied a couple of generous coats.
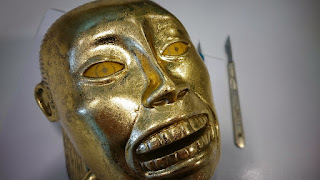
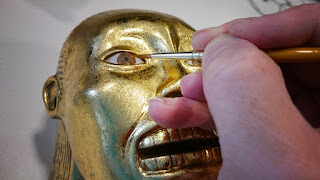
The final step was to paint in the eyes. The Propstore idol has eyes that are ever so slightly off centre. My first attempt at the eyes I replicated this however the cross-eyed look was a little too distracting so my second attempt I straightened them up.
I used acrylic paint before applying a few layers of varnish for a high gloss.
Unfortunately before I could take any beauty shots we had a bit of an incident and the idol took a bit of a tumble.
The damage was pretty severe. It cracked a great deal of the filler covering the surface and some parts had been lost altogether. I decided to view this as an opportunity. I had not been satisfied with the gold surface originally achieved so I thought perhaps on my second attempt I would try something different.
I started to repair the damage with milliput, gently sanding and smoothing the surface as I worked. I had some terrible trouble when applying primer as I was sanding through to layers underneath that consisted of fine sheet metal, tacky size and unfriendly gold paint. It proved such a pain that I ended up having to sand almost right back to the plastic model underneath.
That's where we're up to at the moment. I'm intending to take a casting of this as a kind of "save" point, and from here I can safely experiment with the finish without fear of screwing it up. ChickenHaunt over on the RPF did a fantastic idol with moving eyes, at some point in the future I might be tempted to do something similar. Hopefully get some spare time soon.











"This 3D printing project of the fertility idol is impressive! Check out some interesting franchise opportunities: Franchise in India and McDonald's franchise cost."
ReplyDelete"Incredible detail on the 3D print! If you're into industrial solutions, check out these: Staff Locker in Delhi and Slotted Iron Rack de Delhi."
ReplyDeleteWhat a great way to blend creativity and technology! Check out Laser Marking Machine in Delhi and SEO Company in Delhi."
ReplyDelete"Impressive modeling skills here! If you're looking for heavy-duty racks, here are some great options: Heavy Duty Rack in Delhi and Chain Conveyor in India."
ReplyDeleteThis 3D printing project is amazing! Speaking of industrial solutions, check out these: Staff Locker in Noida and Angle Iron Rack de Delhi."
ReplyDeleteWhat an incredible work of art! If you're interested in laser machines, check out Laser Marking Machine in Delhi and SEO Company in India.
ReplyDelete"That gold leaf finish is fantastic! If you're looking for business opportunities, here are a couple of great resources: Invest in Brands India and Sreeleathers Franchise."
ReplyDelete"Love the antique finish on this! Looking for a fabric roll rack? Check out Fabric Roll Rack and Chain Conveyor in India."
ReplyDelete"This idol looks stunning with that gold finish. For storage solutions, check out Mobile Compactor in Noida and Warehouse Racking System in Indore."
ReplyDelete"Great detailing on the idol! For industrial machinery, take a look at Dust Collector for Plywood and Shrink Tunnel in Delhi."
ReplyDelete"Such precision in the idol! If you're into business opportunities, explore Business Opportunities India and Zepto Franchise."
ReplyDelete"Incredible attention to detail! For all your racking needs, check out Mobile Compactor in Noida and Warehouse Racking System in Indore."
ReplyDelete"The gold finish is amazing! For industrial machinery, take a look at Dust Collector for Plywood and Shrink Tunnel in Delhi.
ReplyDeleteThis idol looks amazing with all the details. Interested in a laser marking machine? Check out Laser Marking Machine in Manufacturer and SEO Services."
ReplyDelete"Love the textures and finishes! For your next business venture, check out Invest in Brands India and Sreeleathers Franchise."
ReplyDelete"What an inspiring project! For racking solutions, check out Fabric Roll Rack and Chain Conveyor in India."
ReplyDeleteThe idol looks fantastic! Looking for a mobile compactor? Check out Mobile Compactor in Noida and Warehouse Racking System in Indore."
ReplyDelete"This idol is incredible! For all your racking needs, check out Dust Collector for Plywood and Shrink Tunnel in Delhi."
ReplyDelete"The level of detail is mind-blowing! Explore franchise opportunities with Invest in Brands India and Zepto Franchise."
ReplyDelete